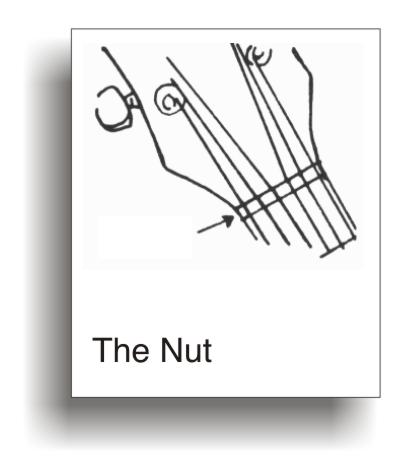
THE NUT
To start our setup, we are going to take a close look at the NUT. We want to know that our nut is in perfect working condition before we do any other adjustments.
FUNCTION OF THE NUT
Sets string length at neck for proper intonation. Spaces strings on neck. Places strings at playing height off fingerboard.
INDICATION OF PROBLEMS WITH THE NUT
Guitar won’t stay in tune. String buzz on first fret. Strings breaking at nut. Poor intonation.
WHAT TO LOOK FOR
First make sure the nut is sitting in its proper position. In other words, make sure there are no gaps between the nut and the areas it sits against. (Tight against the fingerboard, etc.) 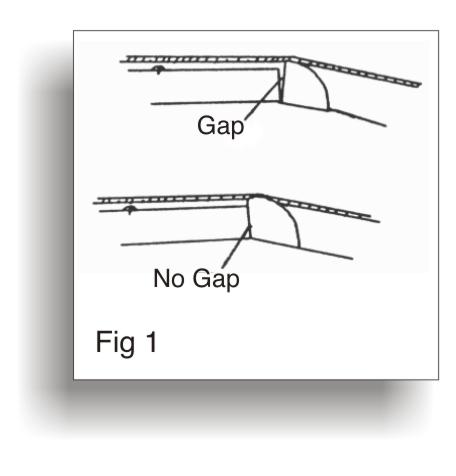 (See Fig. #1) If there are gaps, you will need to take this to your local repairperson to fix.
Next, let’s look at the spacing between the strings. Looking straight down on the nut, do all the strings appear to have the same amount of space between them? They should.
As you play, do you feel that some of the strings are closer than others?
Also, sometimes the two outside strings will be too close to the edge of the fingerboard and have a tendency to “fall off” when pressed down.
If any of these things happen, then you need to reposition one or more of the strings. To do this will require either a new nut or a repair technique beyond the scope of this manual. Consult your local repairperson.
If the nut is sitting properly on the neck, and the strings are spaced properly, then the next step is to look at the slots themselves. This is the most important (and often most overlooked) part of the nut, particularly as it relates to how well the instrument stays in tune.
The main thing to understand about the string slots on the nut, is that this is the point at which the string length begins. The nut slot must always be cut so the slot falls away from the leading edge (next to the fingerboard). 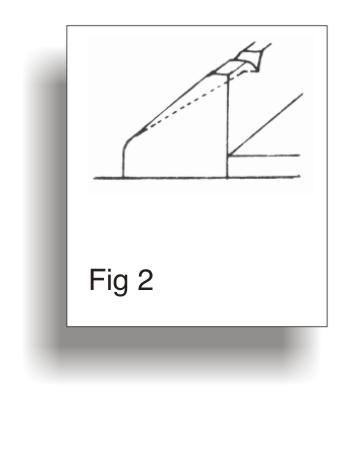 (See Fig. 2) In other words, as the slot goes from front (front being next to the fingerboard) to back (headstock side), the slot should cut downwards as well. If this slot were cut straight through the nut (parallel with the strings), then the string would and could sit at different points within the slot, thus changing string length and causing tuning problems.
Since the strings themselves act like files as they drag through the slot (while tuning or string bending, etc.), over time you will wear the slots flat. You will then need to recut the slot to put the string length back properly to the front of the nut. Take the strings out of the slots and examine the bottom of the slots carefully. If the slot seems to go from front to back almost straight, without falling away from the string, it may need to be filed.
NOTE: If you are having trouble keeping the instrument in tune, then this is the FIRST area of potential problems and should be dealt with first.
ADJUSTMENTS:
The tools for cutting these slots are not common, everyday, around-the-house tools and can be expensive. For this reason, to do the job properly, you may want to take the instrument to your repairperson if you feel this needs attention.
But, if you have access to a suitable set of files (like small diameter needle files that can cut thin slots), and wish to do this yourself, remember to mask off all areas around the nut so your files won’t damage or mar the finish. (See Fig. #3) 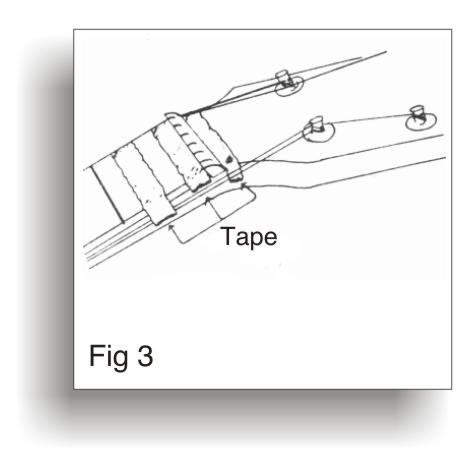
When you start filing the back side of the groove to undercut the slot, be sure not to file the front edge (next to fingerboard), thus lowering the string height above the fingerboard. To help determine what part of the nut slot you are cutting, take a pencil and work lead into the slots to color them. Then when you file away the back side of the slot, you can see how close to the front edge you are by how much pencil lead is still visible. If you’ve lost all your pencil lead, then you know you’ve gone to far to the front and have lowered the action at the nut. Avoid this! Leave between 1 and 3/64ths of an inch of surface for the string to sit on. This is plenty.
If you cut your slot right to a point, you may experience string breakage at the nut. This, of course, is caused by a sharp edge. Also be careful to make the slot wide enough for each string. If the slot pinches the string, it will cause tuning problems and string breakage.
HOW HIGH OFF THE FINGERBOARD SHOULD THE STRINGS BE AT THE NUT?
There are a couple of factors to be considered here; personal feel and physical playability. In other words, if it feels good, it is probably OK. If it seems too hard to push down the first position chords, or if the strings buzz when played open, then you will need to deal with this problem.
NOTE: Don’t do your final setting of the action at the nut until you have done ALL OTHER set up procedures EXCEPT INTONATION. This is the last adjustment that should be made EXCEPT FOR THE INTONATION SET UP!
If the action at the nut is too high…
Again, because of the need for special files, you may want to have your repairperson look at this with you. But, if you have the tools and want to try this, just remember…
Be sure to have all strings on and tuned to pitch before you start.
Take one string out of its slot at a time and file that slot, replacing the string to check the depth. File very, very small amounts at a time to bring the string closer to the fingerboard. Remember to file down through the nut from front to back as mentioned earlier. When you feel the action for that string is right, go to the next string and so on.
If the action at the nut is too low…
You know the action at the nut is too low when all other adjustments (truss rod, neck set, etc.) are properly made and the open string buzzes on the first fret.
If there is fret buzzing on the second, third, or higher frets, then this IS NOT caused by too low action at the nut. To adjust fret buzz at any other point (other than buzz on the first fret by the open string), you need to look at the truss rod, bridge, neck set, etc. (which is explained later in this book), or you may need to have the frets filed. To determine which is your problem, you may want an experienced repair- person to take a look.
If you are getting first fret buzz, you may be able to remedy it by;
1) raising the over all action at the bridge, (as explained later) or
2) by letting the neck bow just a slight bit more away from the strings by adjusting the truss rod. (also explained later)
Of course, both of these remedies will cause your overall action to be higher. If you have made either adjustment, check the action on the neck from about the 5th fret on up. If the instrument still feels good to you, and you no longer have first fret buzz, then you are set. If this action is not acceptable, then lower the action back to where it was and take the instrument in to an experienced repairperson.
CAUTIONS: The entire process of cleaning the slots or lowering the action at the nut requires precision work and patience. If you hurry and file one groove too low, you’ve ruined the nut and a repairperson will need to replace it.